Monitor and Troubleshoot Faster with Lens
Adding your Kubernetes cluster to Lens is a straightforward process that enables you to manage and monitor your workloads with ease. This guide will walk you through each step in detail to ensure a smooth setup. Follow these steps to get started:
Step 1: Open Lens
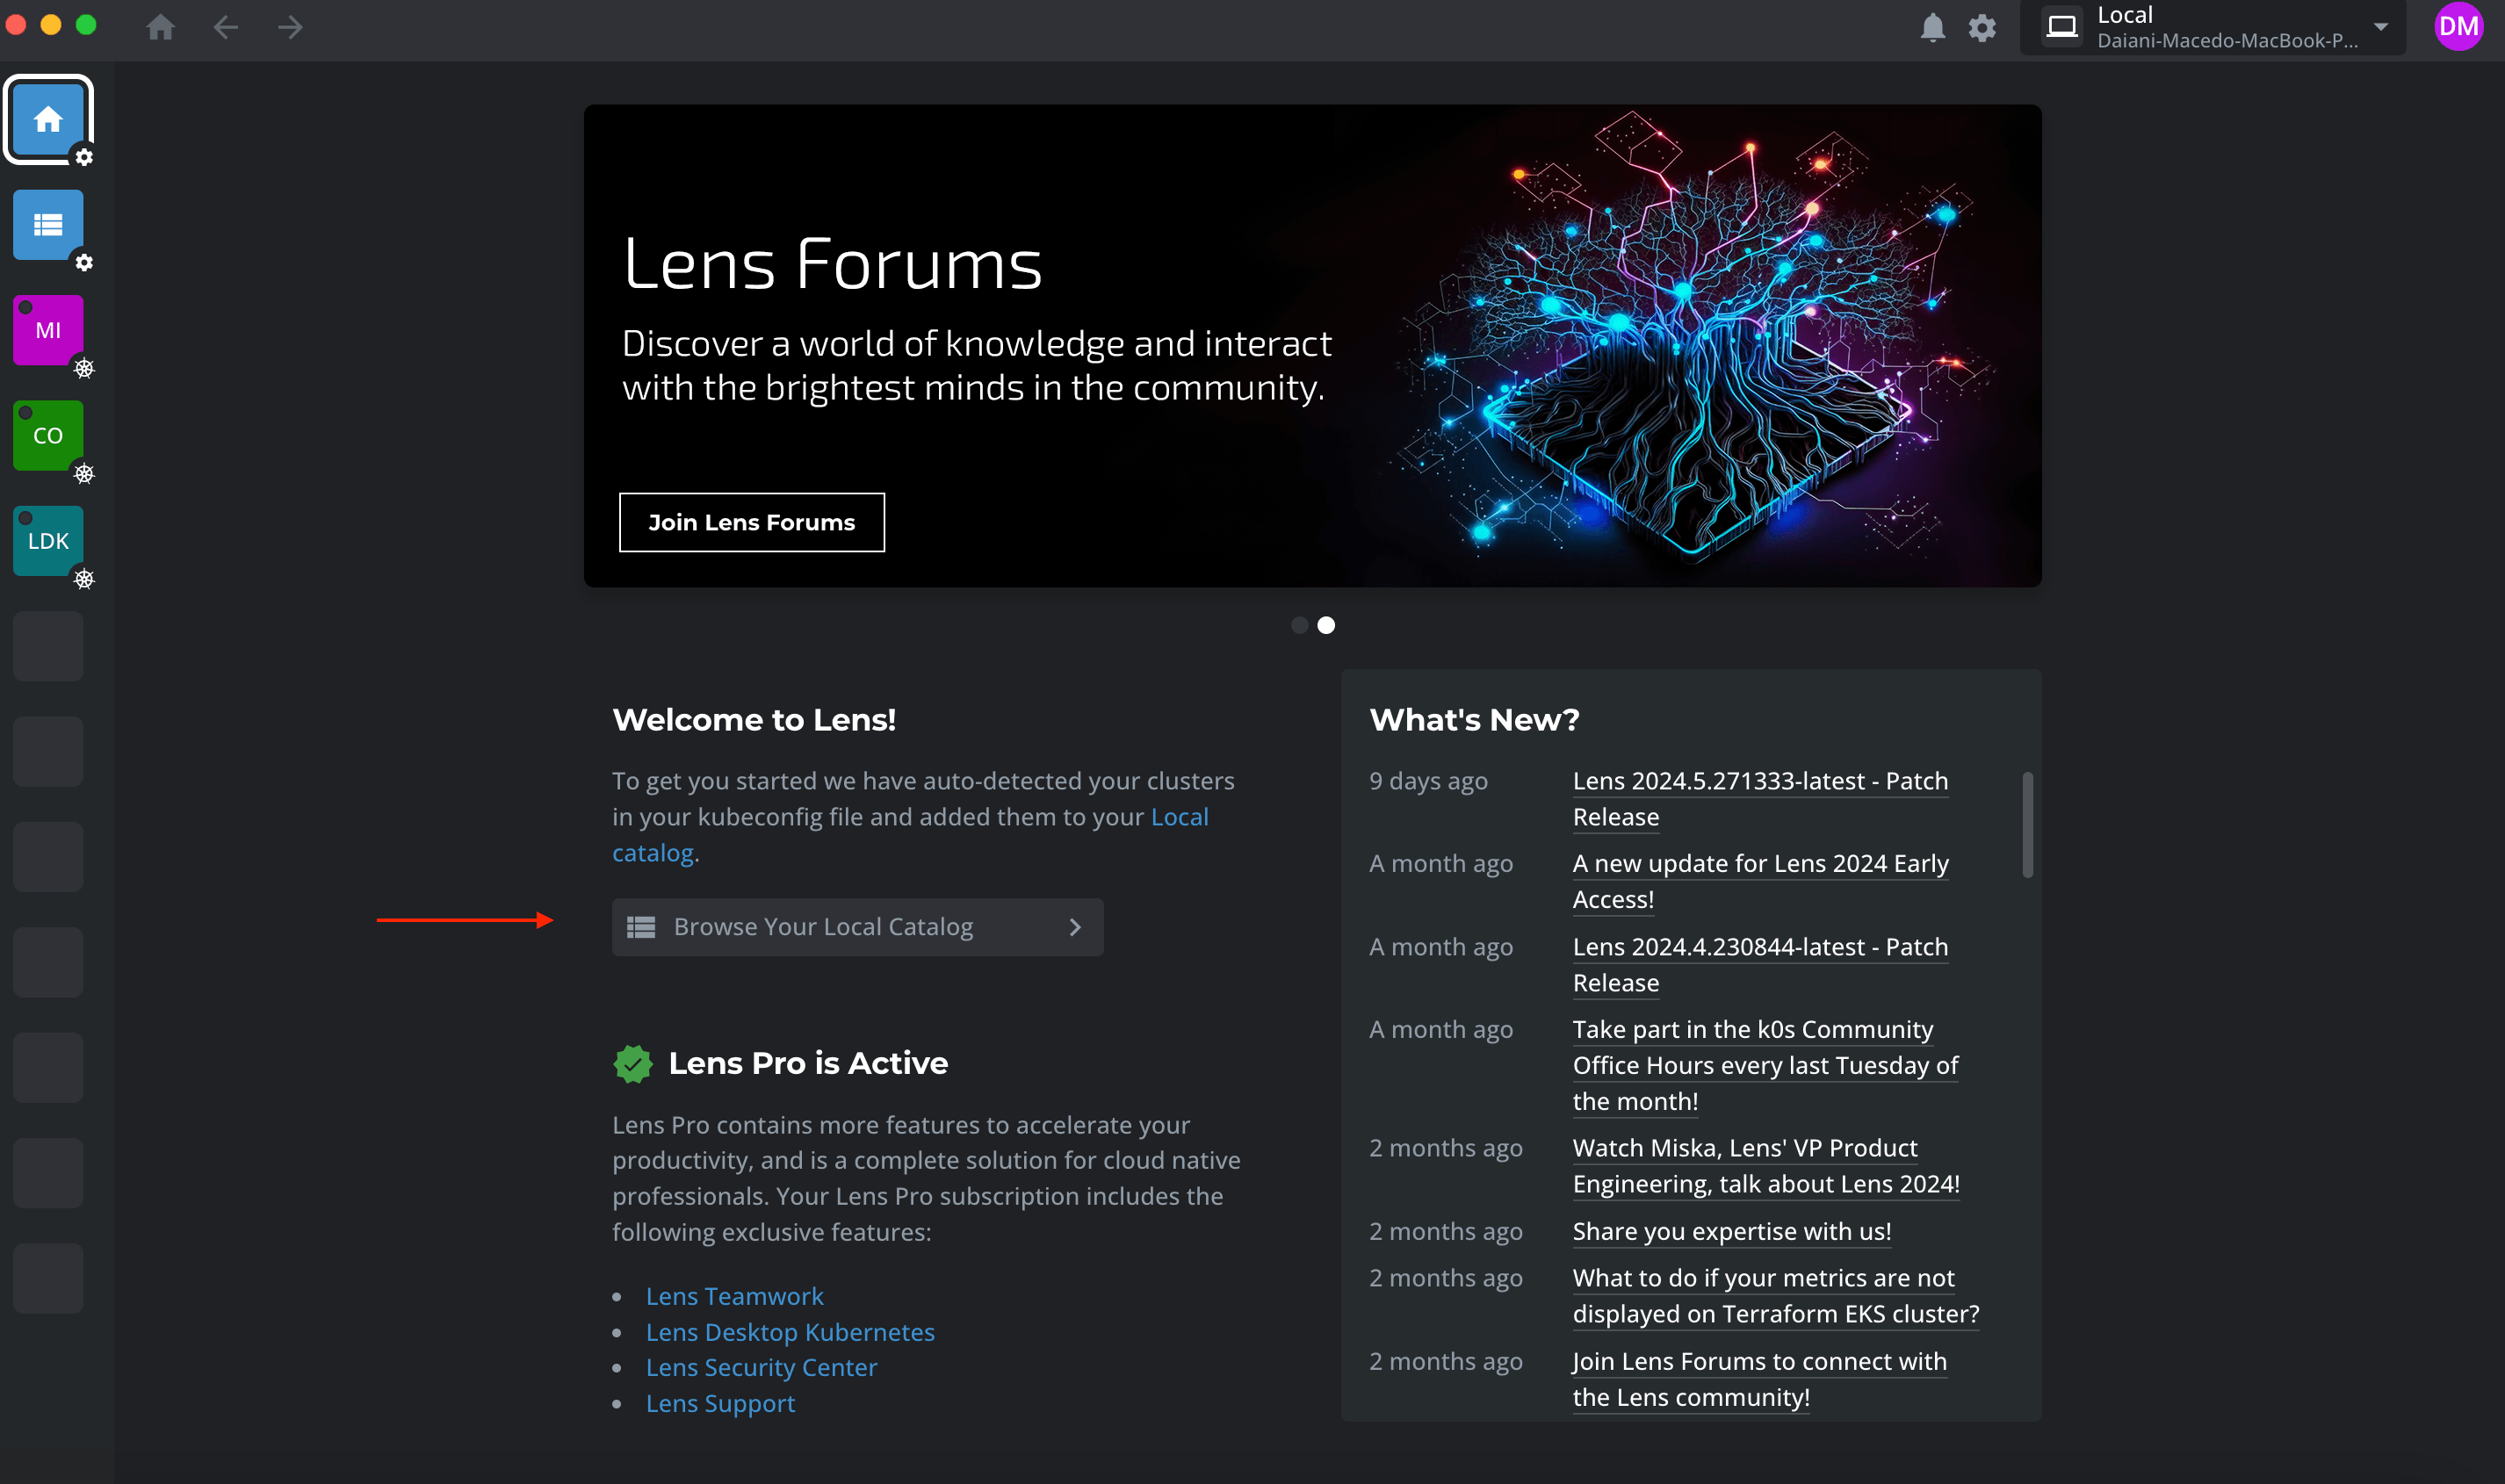
First, open the Lens application on your desktop. If you haven't installed Lens yet, download it from the Lens website. Installation is quick and simple, ensuring you can start managing your clusters without delay.
Step 2: Access the Catalog
On the Lens home screen, you’ll find several options for managing your clusters and resources. Click on "Browse Your Local Catalog." The local catalog is a central hub where you can manage all your local resources and add new clusters. This feature is designed to streamline the process of resource management, making it easier to keep track of your Kubernetes environments.

Step 3: Navigate to Clusters
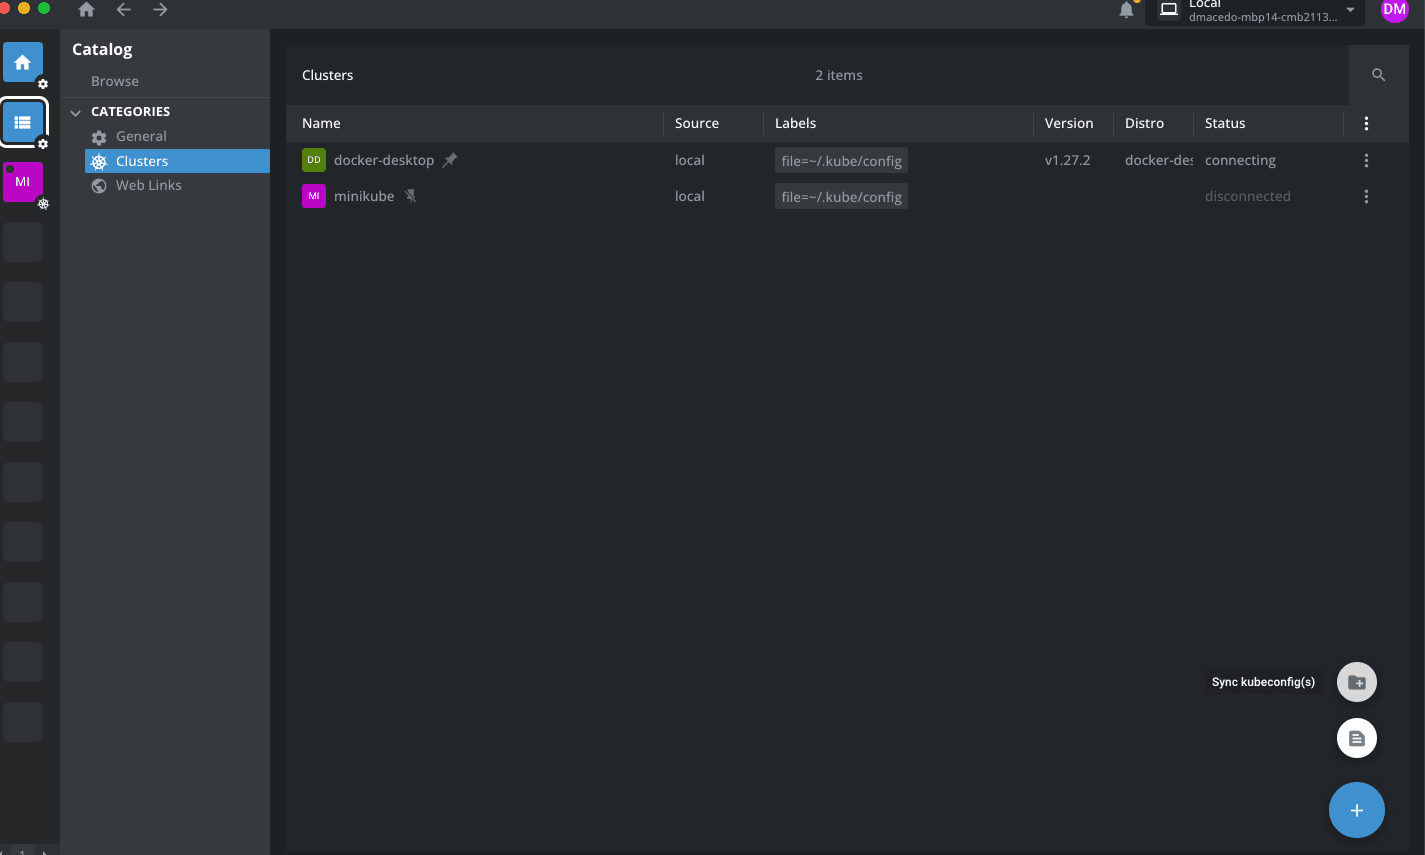
Once you are in the local catalog, navigate to the "Clusters" tab. This section is specifically dedicated to your Kubernetes clusters. Here, you will see an overview of all clusters that have been added to Lens. This tab is crucial as it provides a centralized view, allowing you to manage multiple clusters from a single interface.

Step 4: Add Your Cluster
Adding your Kubernetes cluster to Lens can be done in a few different ways. Lens offers flexibility to suit different user preferences and configurations:
Automatic Detection: Lens has a built-in feature that automatically detects and syncs kubeconfig files from your local machine. This method is convenient if you have your kubeconfig files saved in the default locations. Lens will scan these locations and automatically add the clusters it finds.
Manual Addition:
- Click on the ‘+’ sign located in the Clusters tab. This action will open a dialog box with different options for adding your cluster.
- Manually Copy and Paste Your Kubeconfig File Content: If you prefer to manually manage your configurations, you can copy the kubeconfig file content and paste it into the provided text area. This method gives you full control over which configurations are being added.
- Sync Kubeconfig File: Another option is to click "Sync Kubeconfig File," which allows you to browse your local files and select the kubeconfig file manually. This method is useful if your kubeconfig file is stored in a custom directory.
Detailed instructions and screenshots for these methods can be found in the Lens documentation. Each method is designed to be user-friendly and to accommodate different levels of technical expertise.
Step 5: Cluster Overview
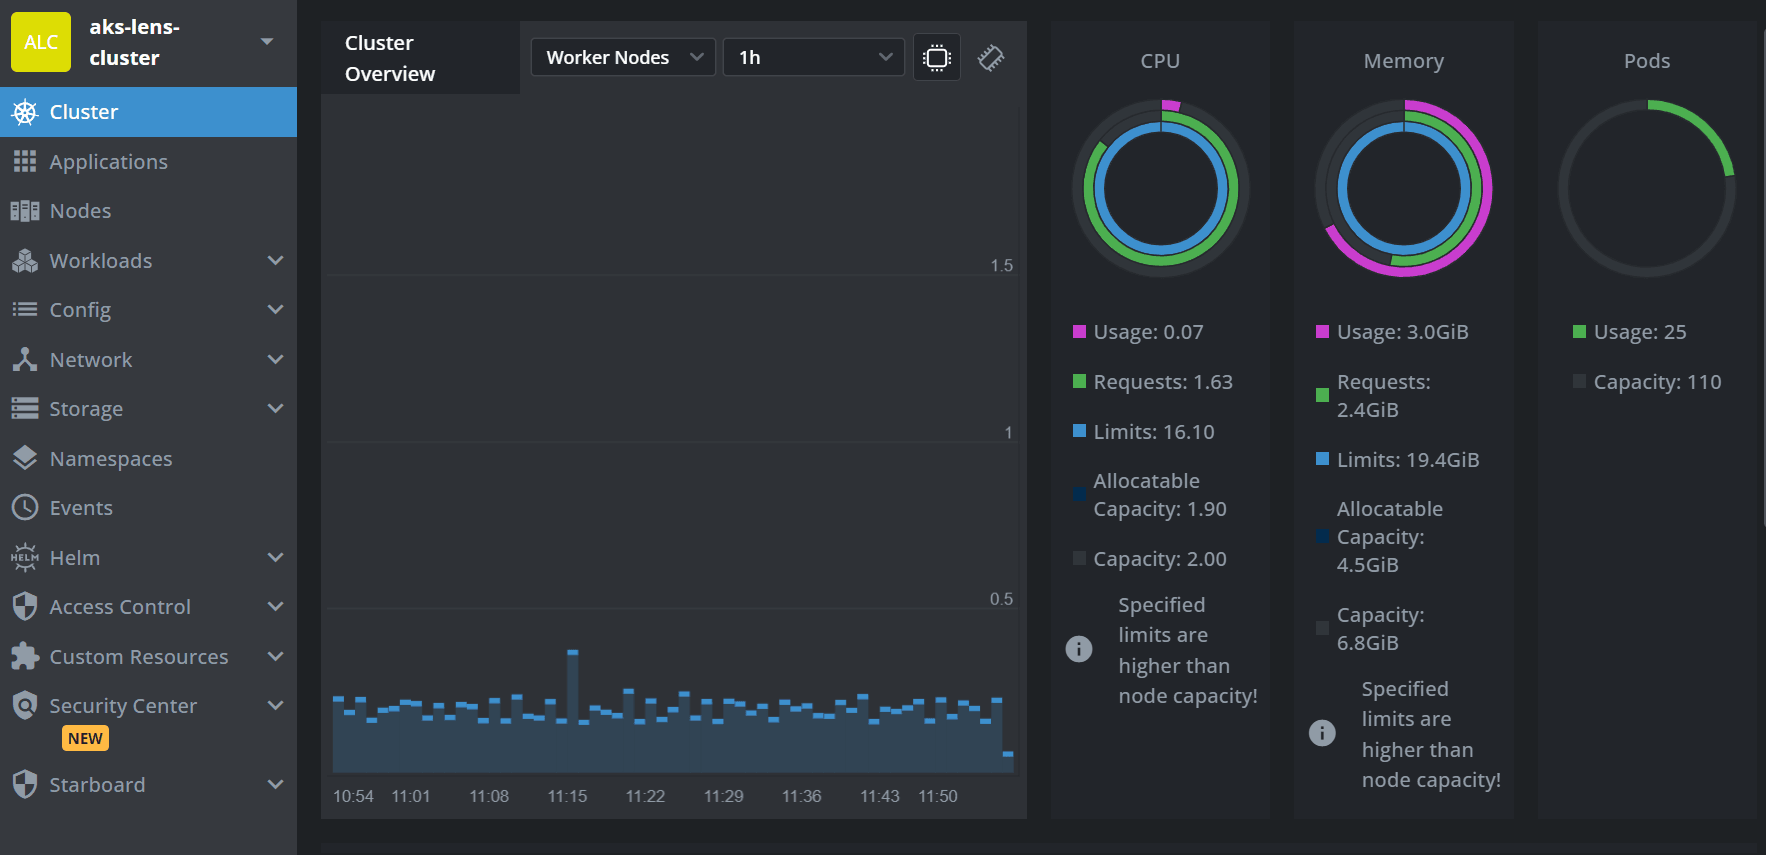
Once your cluster is connected, Lens provides a comprehensive overview of your cluster. This includes namespaces, workloads, and resources. The overview screen is designed to give you a snapshot of your cluster's health and status. You can use the sidebar to navigate through different resources, such as Pods, Deployments, Services, ConfigMaps, Secrets, and more. Each section provides detailed information and management options, making it easier to troubleshoot and optimize your Kubernetes environments.

Additional Features and Tips for Using Lens
Monitoring and Troubleshooting
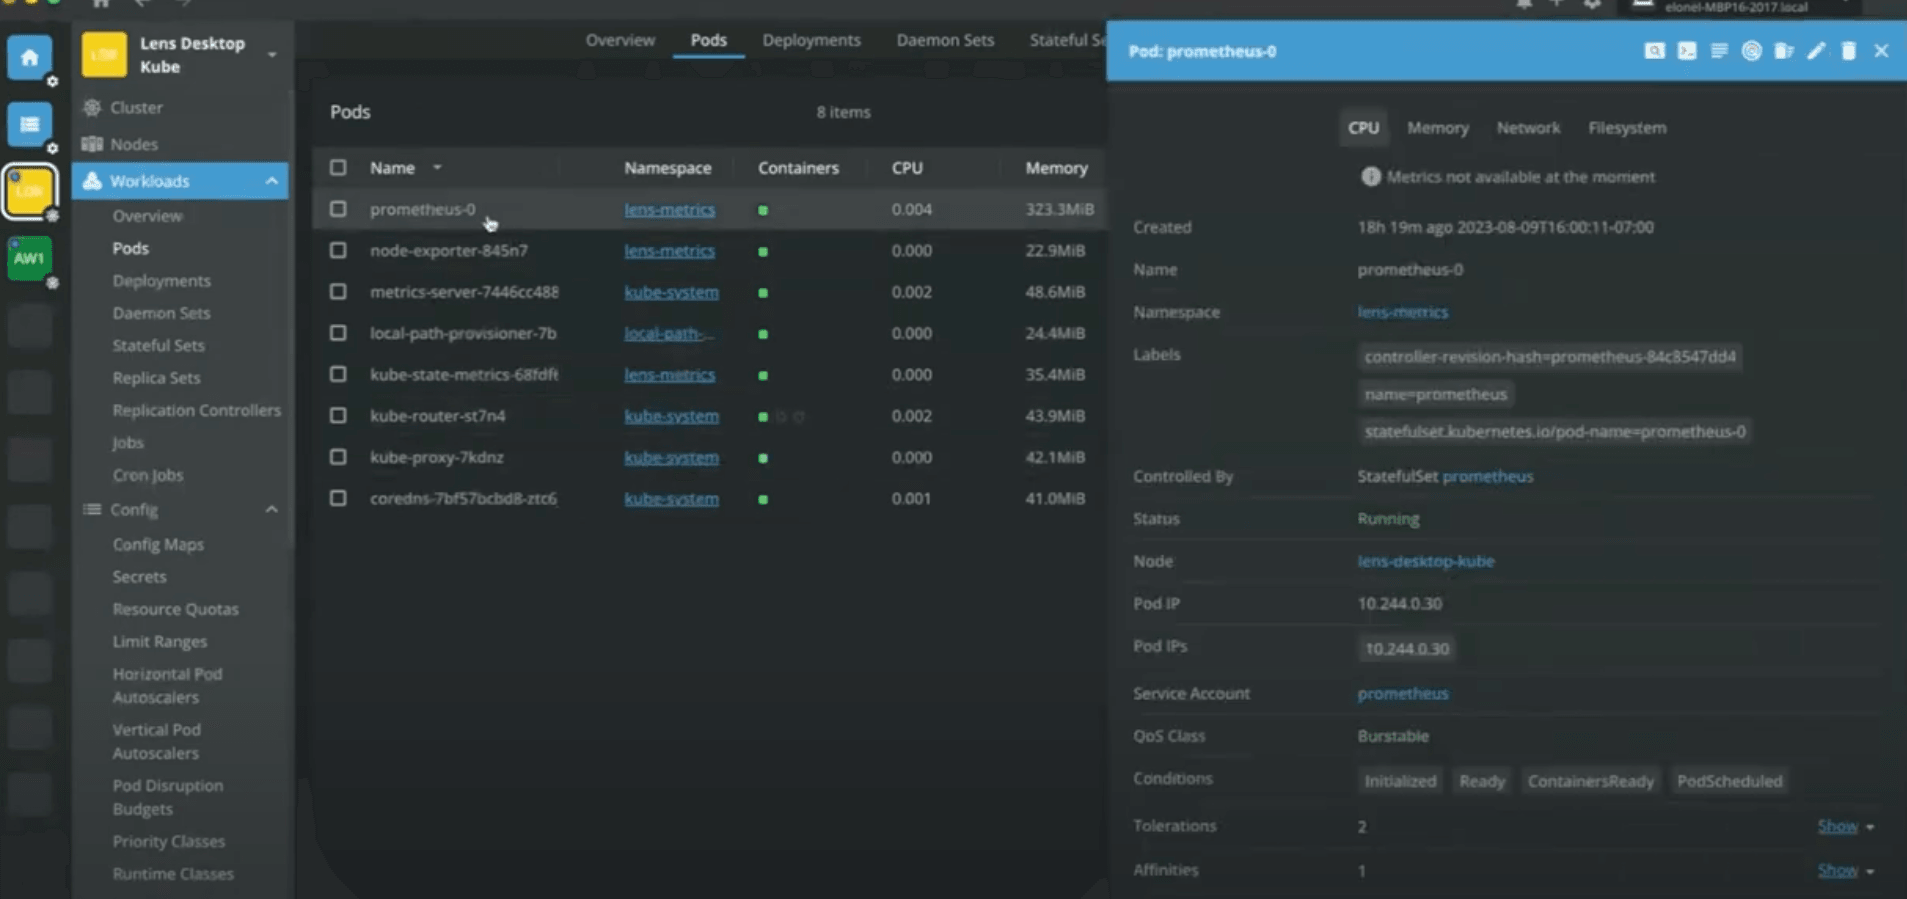
In the Workload Panel, you can monitor your workloads and deployments and see logs for real-time insights. This panel is specifically designed for managing and troubleshooting workloads, providing a central location to oversee the status and performance of your applications. For troubleshooting your workloads and deployments, the Workload Panel is your go-to tool.

Premium Features
For advanced users, Lens Pro offers additional premium features that enhance the Kubernetes management experience:
- Lens Desktop (LDK): Provides a more robust desktop experience with additional functionalities and integrations.
- Team Collaboration: Share clusters and resources with team members to collaborate effectively.
- Security Center: Advanced security features, including scanning and reporting
Need Help?
If you encounter any issues or have questions, there are several resources available to assist you:
- Visit our documentation for more detailed instructions and troubleshooting tips. The documentation is comprehensive and regularly updated, ensuring you have access to the latest information and best practices.
- Join our community on Lens Forum for help from fellow users and our support team. The forum is a great place to ask questions, share experiences, and learn from others who are using Lens.
Happy Clustering with Lens!
By following these steps, you’ll be able to add your Kubernetes cluster to Lens and take full advantage of its powerful management and monitoring features. Lens is designed to simplify Kubernetes management, making it accessible and efficient for users of all levels.
Start exploring the full potential of your workloads with Lens today!
