How to Use Kubectl Port-Forward: Complete Guide for Kubernetes Developers
Port forwarding is a powerful Kubernetes feature that helps you debug your applications, test your connections, and can help you access internal dashboards. With port forwarding you don’t have to mess around with your cluster’s network to do any of these tasks, making it an ideal choice for when you are developing new applications or features.
In this article, we will walk through everything you need to know about kubectl port-forward, from the basics to real-world use cases.
Why you need port forwarding in Kubernetes
In Kubernetes, your applications live in isolated networks, which is great for security, but can become a pain fast when you actually need to interact with the things you are developing.
Port forwarding creates a secure tunnel between your local machine and whatever service you want to reach in your cluster. It is a temporary connection, and this means that you don’t have to modify anything in your cluster configuration to use it.
Understand kubectl port-forward basics
Kubectl port-forward creates a network tunnel from your local machine straight to a resource that is running in your Kubernetes clusters. Under the hood, it actually establishes a connection through the Kubernetes API server, which then acts as a proxy to get your traffic to the targeted service.
When you run a port-forward command, kubectl starts listening to whatever local port you specify, and all the traffic gets forwarded to the port you designated on the target resources. This connection stays alive until you kill the command, which makes it perfect for interactive debugging sessions or when you need temporary access to something.
The power of port-forwarding stands in its simplicity; you don’t have to configure ingress rules, or spin up load balancers to access your server, you just borrow a path through the Kubernetes API server to reach what you need.
How port forwarding actually works
When you run a port-forwarding command, kubectl connects to the Kubernetes API server using your kubeconfig credentials. The API server checks who you are and if you have permission to access the resource you are trying to reach. As soon as you are authenticated, the API server creates a streaming connection to your target pods. When you send traffic to your local forwarded port, kubectl grabs that traffic and sends it through the streaming connection to the API server, which in the end forwards everything to the right port on the target pod.
From your laptop’s perspective, you are just connecting to something on localhost, while from the pod’s perspective, it is just receiving normal network traffic on its designated port.
You should keep in mind that port-forwarding works at the TCP level, so don’t try to use it with UDP protocols, because it is not supported.
When to use port forwarding
Port forwarding can be used in different scenarios throughout your and let’s take a look at some of the most common ones:
- Local development: You are working on your microservices locally, but you need them to talk to services that are already running in your dev clusters. By using port forwarding, you can do this without having to replicate your entire environment on your laptop
- Debugging: If something is acting weird in your cluster and you need to find out why, you can do that by port forwarding to your service. You can easily observe if the service is working properly.
- Database access: With port forwarding you can connect your local database client directly to your databases and run queries, do schema migrations, analyze data, all without exposing your databases to the internet
- Temporary access scenarios: You might need to access a dashboard, for example Grafana, to check out some stats, or you might want to look at a Prometheus metrics endpoints. Instead of setting up, and Ingress or a Load Balancer, you can simply port forward for a few minutes, do what you need to do, and then simply disconnect
- Testing: Rather than exposing every single service externally, QA can forward specific ports and do their tests with production-like configurations
Getting started with port-forward commands and syntax
The most basic usage forwards a single port from a pod to your local machine:
kubectl port-forward pod/nginx-pod 8080:80
This forwards local port 8080 to port 80 on the nginx-pod. Now, if you open your browser and go to localhost:8080, you can access nginx. If you want your ports to match on both sides, you can simply run:
kubectl port-forward pod/nginx-pod 8080
You don’t have to port forward to a pod, you can do that directly to a service as well. When you port forward to a service, Kubernetes automatically picks one of the backend pods for you. This is great, especially if you have multiple replicas, as you don’t need to find the exact pod names.
kubectl port-forward service/nginx-service 8080:80
The same is valid for deployments as well:
kubectl port-forward deployment/my-deployment 8080:80
By default, kubectl port-forward only listens on localhost, but if you need to use other machines, you can specify the address field:
kubectl port-forward --address 0.0.0.0 pod/nginx-pod 8080:80
If you need to forward multiple ports at once, you can simply list them:
kubectl port-forward pod/my-app 8080:80 8443:443
On the other hand, if you want Kubernetes to find an open port for you, you can simply omit the local port:
kubectl port-forward pod/nginx-pod :80
Other ways to access your Kubernetes services
While port forwarding is great for a couple of use cases, it will not be the right tool for every job. Let’s explore some of the alternatives you could leverage for port forwarding.
LoadBalancer services create persistent external endpoints which are perfect when applications need constant external access. The only downside to them is that they will cost you money, so they are not ideal for temporary or development access.
Ingress controllers offer HTTP routing capabilities and are excellent if you need host/path-based routing or TLS termination. They are more complex to set up and typically only work with HTTP/HTTPS traffic.
NodePort services are kind of a middle ground as they expose your application on a specific port across all of your cluster nodes. They work well for internal services, especially in on-premise environments where you don’t have Load Balancers available.
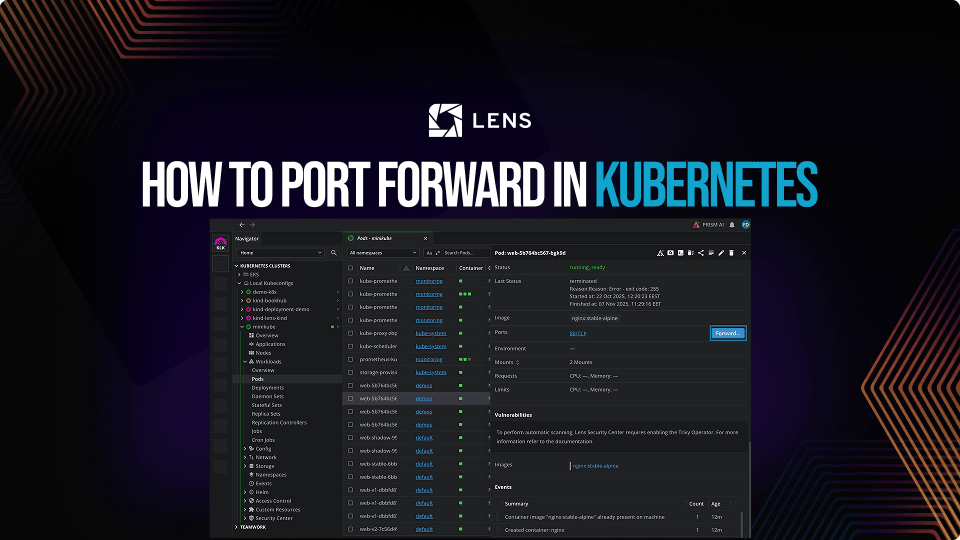
Port forwarding made easy with Lens Kubernetes IDE
Lens Kubernetes IDE transforms port-forwarding from a CLI command into something visual and user friendly.
In Lens, you will simply go to your pod, service, or deployment, click on it, and then you will see the ports you can forward to. Check out this video to see it in action:
The real power of Lens Kubernetes IDE is how everything integrates. You can view logs, attach to pod shells, forward ports, and even take advantage of AI debugging capabilities that can help you troubleshoot your issues faster. You don’t need to juggle a dozen terminal windows and browser tabs as everything is right there, nor will you need to remember multiple kubectl commands, making Kubernetes management much easier.
Key points
Port forwarding gives you secure, temporary access to cluster resources without you needing to set up complex networking. If you need something persistent and always on, port forwarding will not be the best solution, so in this case you should use LoadBalancers or Ingress controllers.
Using port forwarding from Lens Kubernetes IDE offers a great advantage as you can easily leverage all the other features Lens has to offer from viewing logs to a powerful AI assistant that can help troubleshoot your issues.
If you want to make Kubernetes management a breeze, download Lens Kubernetes IDE today.